When an application is trying to obtain an access token for a user in order to modify or access a user’s data, the authorization workflow is used instead. This is analogous to the OAuth 2.0 Authorization Code workflow described in Accessing Data, except without pre-registration of clients since URLs are used instead.
The basic flow for a user authorizing an application follows:
- The user enters their personal URL in the sign-in form of the application.
- Discovery: The application fetches the URL and finds the user’s authorization and token endpoints.
- Authorization Request: The application directs the user’s browser to the authorization endpoint discovered, as a standard OAuth 2.0 Authorization Grant and requested scopes, along with the user’s URL entered in the first step.
- Authentication/Approval: The user authenticates at their authorization endpoint, sees the requested scopes, and approves the request. The authorization server generates an authorization code and redirects back to the application’s redirect URL.
- Token Exchange: The application makes a request to the token endpoint to exchange the authorization code for an access token. The token endpoint responds with an access token and the full URL of the user who authenticated.
Authorization Request
When the application builds the URL to authenticate the user, the request looks very similar to the OAuth authorization request, except no pre-registration of the client is necessary, and the request will also include the user’s profile URL. The URL will look like the below.
https://user.example.net/auth?
    me=https://user.example.net/
    &response_type=code
    &redirect_uri=https://example-app.com/redirect
    &client_id=https://example-app.com/
    &state=1234567890
    &code_challenge=XXXXXXXXXXXXXXXX
    &code_challenge_method=S256
    &scope=create+update
Note that unlike in the authentication request above, this request includes response_type=code and a list of requested scopes the app is requesting.
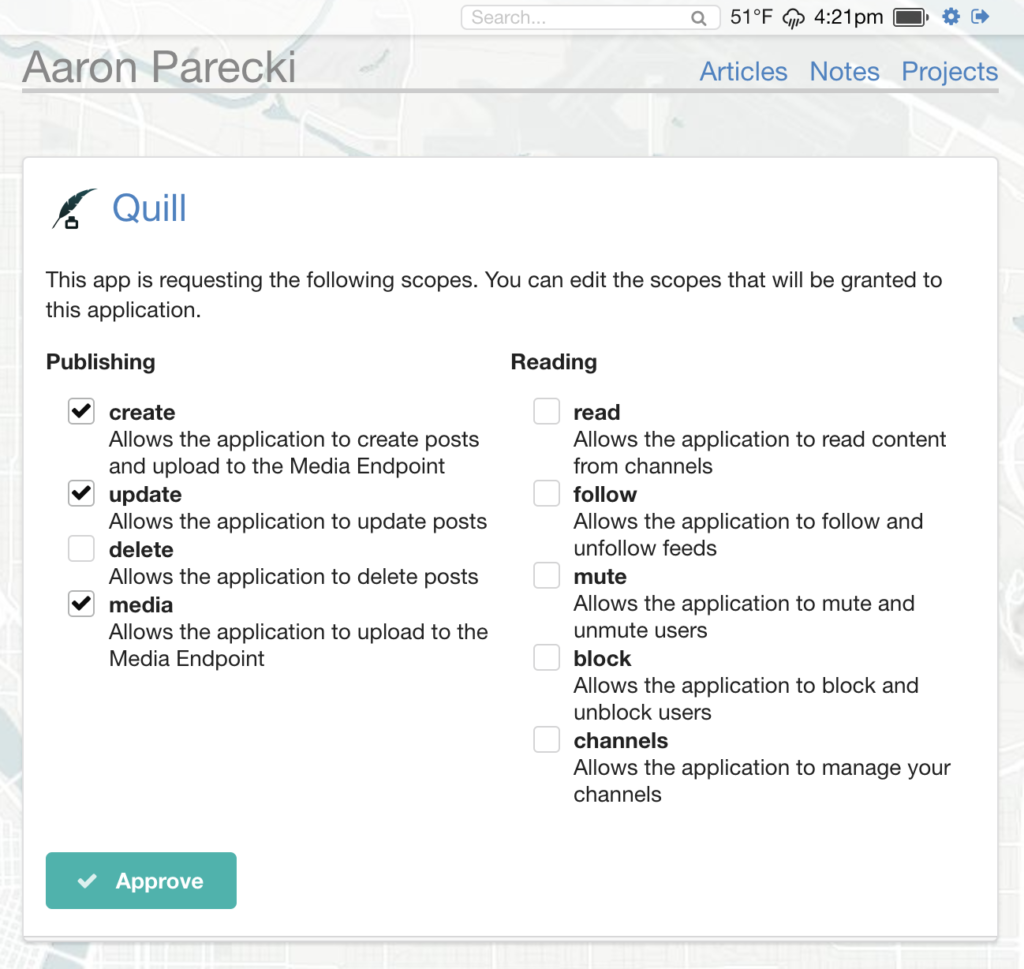
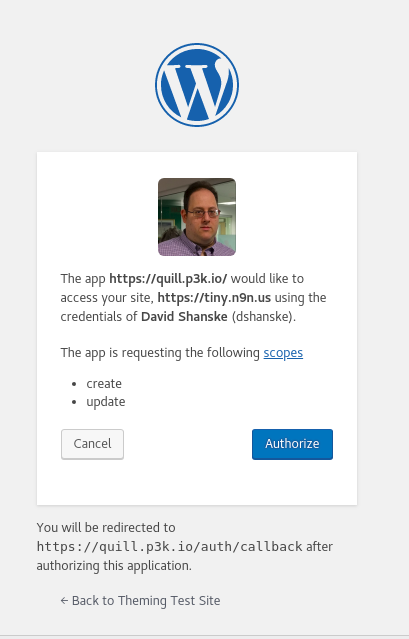
The authorization server will ask the user to log in, then present them with an authorization prompt.
Different IndieAuth servers may present this prompt differently, as shown in the screenshots from my website’s authorization server and the WordPress IndieAuth plugin shown below.
When the user approves the request, the server redirects the user back to the application with an authorization code in the query string.
To obtain an access token, the application makes a POST request to the user’s token endpoint (the endpoint was discovered in the first discovery step) with the authorization code and other required data.
POST /token
Host: user.example.net
Content-type: application/x-www-form-urlencoded

grant_type=authorization_code
&code=xxxxxxxx
&client_id=https://example-app.com/
&redirect_uri=https://example-app.com/redirect
&code_verifier=XXXXXXXXXXXXXX
The token endpoint will generate an access token for the user, and respond with a normal OAuth 2.0 token response with the addition of the profile URL of the user who authorized the app.
HTTP/1.1 200 OK
Content-Type: application/json

{
  "me": "https://user.example.net/",
  "token_type": "Bearer",
  "access_token": "XXXXXX",
  "scope": "create update"
}